Monday, February 14, 2011

Sugar Scoops?

This weekend I think I got a lot done.  When Rodney left the other night, I had been searching high and low for some little captive nuts and holders that go on the headlight buckets.  About 2 minutes after he left, I walked over to the workbench and there they were, in the little baggie that I put them in.  Go figure!  So I proceeded to put the headlight buckets together.  They go into the diaphragm panels that then mount in the bonnet. This whole process requires a pretty specific sequence.  If you don't put it together in the right sequence, you will just have to take it back apart. Don Pritchett came over Saturday night and was a big help getting the diaphragms mounted.  It's a difficult thing for one person to do.  There are a number of wiring connections to be made.  The horns, the headlights and the side marker (parking) lights.  I mounted 2 new "after market" horns and had to fabricate a bracket for them.  Don then helped me run the wires.  I managed to get both sides put together and installed.   


Then came the Sugar Scoops.... They are the little curved pieces of bodywork that fill the recessed hole under the headlights.  I think the same guy must have designed these things that designed the fuel tank.  First you have to figure out how to get the things into the hole where they will reside.  By all appearances, they are too big to go in, but eventually, you turn them just the right way and they just fall in.  Then you have to align 3 captive nuts to get it mounted.  It's kind of like building a ship in a bottle..  but harder.  I got one completed and I got two of the captive nuts lined up on the other one but will need some help getting the last bolt in.  I need somebody to bend the sugar scoop from one side while I start the bolt from the other.  I then was very anxious to get at least one glass cover and chrome surround on so I could feel like I had completed something.  Maybe Stuart will be here tomorrow and he can help me to get the other sugar scoop in.


I also had some time to glue new vinyl on the center section of the dash. I think that went ok, I'm letting the glue "cure" now.  I still have the other two sections to do, but I'm not going to rip the old vinyl off until I see how the center section works out.  I have been doing a lot of things that I'm not real accustomed to doing, but it all seems to be going pretty well so far.

I know I did several other things, but I can't really remember them all right now.  When I think of something, I'll make another post. :-)


Thursday, February 10, 2011

Wires, Wires, Wires

This is probably going to be a short post.  I'm pooped.  I have been working on the wiring for that last day and a half (off & on).  I got the fuse panel wired, that was pretty easy,  Since I am awaiting the gauge seals from Nisonger, I can't connect any of the wires to the instrument panel just yet. So, instead, I started taping labels on the wires when I figured out which one went where.  It's coming along well, I have nearly all of them marked and the ones that aren't are the ones that are pretty obvious.  Having Stuart here working on his Stag has been a big help.  He just happens to be an Electrical Engineer so he's pretty good at reading a schematic.  Rodney came over earlier this evening and helped me run the wires to the back of the car.  Then he watched me wander around looking for one part and then another.  It seems that I have lost every part of this car at one time or another...  I think someone is just messing with me by hiding stuff.  I finally rounded up all the parts for the headlight buckets and started on putting them together.  I'll probably finish that first thing in the morning.


Yesterday, the guy that was doing the welding on my aluminum radiator called and said it was done.  I went and picked it up.  He did an outstanding job.  I had taken my old radiator to him as a pattern for the lower hose connection.  He not only changed the angle like I wanted, he put a larger, heavier pipe on it so that the original equipment hose would work perfectly.  In addition he added a drain.  I am very pleased.


 Tomorrow is going to be mostly a housekeeping day.  I have such a mess in the garage and everything needs to be put back in it's place.  It'll also help me start to find all that lost stuff.

Tuesday, February 8, 2011

The 8 Pin Plug


I had a job in Mobile this morning so I only got to spend a little time on the car.  When I got home, UPS had delivered my new 8-Pin Bonnet Plug.  I have been anxious to get it wired up.  I didn't quite know what to expect, the original ones I have seen in the past don't look to be too conducive to rebuilding.  They are usually extremely tattered and often completely broken.  Mine was in pretty bad shape.  Since everything else on this car is looking so good, I decided to bite the bullet and get a new plug.  I was pleasantly surprised when it came in.  It was fairly easy to assemble, a tremendous improvement to the OEM one. I had to solder each wire on the end, and put it into a screw-down pin and tighten them up (also had to make sure that the wires in both pieces of the plug were in the same holes)  I got it put together in a couple of hours, with coffee breaks along the way.  Now I can install all of the bonnet harness, horns and lights and complete the bonnet.


I also received the dash harness that I was missing.  I had to pay a little more for it than I wanted, but the cheaper one would have taken 4-6 weeks, so it was worth it to me.  Getting the wiring all in the main body of the car is going to be the next big step.  I don't have any jobs for the rest of the week...  at this point anyway...  so I'll be able to devote a lot of time to the project.

I took the aluminum radiator to a welding shop nearby to adjust the angle of the lower pipe. With that done, I will be able to use an original set of hoses.  While he has it, I also asked him to put a drain in the bottom.  It is an aluminum racing radiator, for a Ford, I think.  As I mentioned a few days ago, Ray Livingston wrote an article about it and I decided to give it a try.  It was hundreds of dollars cheaper than one specifically designed for an E-Type.

Other than that, I got to install the bonnet latches on the firewall and Stuart was here so he took a break from dismantling the Stag so we could scratch our heads over the dash wiring.  I'll keep you posted on how that goes.

Sunday, February 6, 2011

The Dreaded XKE Fuel Tank

I worked late last night on the E-Type.  I slept in for a while this morning.  When I went out to the garage, the first thing I did was clean all the glass from the gauges and carefully wrap them and put them in baggies. I bagged the instruments and the switches and put it all in a box and shelved it until I can get the stuff I need to recondition them from Nisonger. Stuart came over shortly after I got into the garage to work on his Stag.  We had a cup of coffee, and about that time Rodney called and said he was going to come over to help with whatever was needed.  When he got here, we decided to install the fuel tank in the E-Type.  Now the fuel tank in an E-Type is legendary for being extremely difficult to take out and put back in.  When the Brits built the E-Type, they very obviously start at the fuel tank and build the rest of the car around it.  The hole in the rear that it goes in is slightly smaller than the tank, there are 2 hoses that need to be hooked up that can only be reached with one hand by anyone with hands larger than a 3 yr old.  Neither of the 2 hoses really fit the pipe where you have to hook them up.  If you don't put it back in in a very exact sequence, you just won't get it installed, and even then, it's still not a sure thing.  To make matters worse, we spent the better part of an hour just looking for the bag of hardware and rubber pads and the bracket.  We wound up digging the old stuff off of the 69 "Katrina" parts car that we bought a couple of years ago.  The stuff was still pretty nasty, but we cleaned them up and proceeded. We then put some of the remnants of the KoolMat on the floor where the tank would sit.
Amazingly, the tank dropped right into place.  But bolting it down and hooking up the hoses was a totally different matter. 
There is a big hose that is very short, about 4 inches, that connects the filler neck on the side of the car to the filler hole in the tank, we will hook that up last.  Then there is a smaller hose that is a tank vent and hooks to the tank and to a vent pipe in the upper part of the filler neck.  We could get half of the job done before we put the tank in, but the filler neck end was up in that hole where you can only get 1 hand.  I let Rodney handle that hose.  He did a stellar job.we clamped it and started on the bolts.;  The first one went in easily.  The next one was not so easy, we had to remove the first one and I had to run a tap through the 2nd one to make sure that the threads were OK and there was no paint in them keeping us from getting it to start.  Once that was done, we managed to get 2 mounting bolts in.  Then the third mount came. With this one you have to mount the bracket to the rear bulkhead and then start the mounting bolt.  This too was a struggle.  About this time I moved a towel looking for something and found the bag full of the original hardware...  it was no more than a foot away from us the entire time we were working on the tank.  With some difficulty, we got the third and last mounting bolt in.


The tank was mounted!  Now I had to deal with the filler hose.  Another 30 minutes and I had it...  Rodney put the hose clamps on and we were done. Altogether it was probably only a 4 or 5 hour job, but it's done, thank goodness.
(and many thanks to Rodney)


One other thing,  I had ordered a new Data Plate.  It's supposed to be a duplicate of the original.  It came today.  I've gotta say that I am VERY disappointed.  Something about it just didn't look right to me.  I pulled out the original one to compare.  First, it was was not even the right size.  It was a quarter of an inch shorter than the original and the font and spacing were totally different.


Saturday, February 5, 2011

Radiator and Instrument Panel


I got up this morning and the first thing I did, after making myself a cup of coffee, was to go pick up Stuart and go look at a Triumph Stag that has been sitting up in a garage for quite sometime.  To make a long story short, the woman that owned it HAD to get rid of it because she was about to move to Colorado.  It was in rough shape in some ways but in others it was really good.
Since he is in the middle of restoring one and needs a number of parts, Stuart negotiated a deal to buy it.  We'll go pick it up Sunday.  After I got back from that early morning excursion, I got busy in the garage.  I couldn't wait to see how the aluminum radiator I purchased from Summit Racing, and the high power, low wattage fan and shroud was all going to fit together.  I got to work on that and sure enough, just like Ray Livingston said, it all fit fine.
The only minor issue I see is just finding an aftermarket flexible lower radiator hose, but that shouldn't be much of a problem.   The whole thing is just fitted, I'll have to take it all back off when I start to put the engine in if for no other reason but to allow myself better access. It's pretty easy, 4 bolts and it out.


Next, I pulled the instrument panel off the shelf and after taking a really good look at it, I thought, "Ya know...  I have gone this far with this little 'clean-up' project, that I should repaint the bezels on these gauges.  I took them off.  I noticed that the vinyl covering was extremely brittle.  Heck. I'm going to replace it too.. I'll order it tomorrow.
I took the bezels off of the 4 small gauges, which was no easy task, but with Stuart's advice and oversight (did I mention that he had come over to continue working on his Stag) I got the little bas....  uh...  bezels off.  The rubber that isolates the metal ring from the glass was shot..  all hard and brittle..  it'll have to be replaced.  At some point during this it dawned on me that these bezels have been on these instruments since I was 13 years old, no wonder they are all dried up and brittle!!!  Seeing this I figured I needed to do the same thing to the speedometer and tach.  The condition of the rubber rings on these gauges was worse.
They just crumbled and fell on the
floor in pieces.  Sigh...  "I'll just order some new ones", I thought.  "I don't have any idea if you can even get these any more.  I think possibly Nisonger Instruments would be the only possible place."  I checked online and it appears that they do carry just what I need.  no prices on their website, I'll have to call them Monday. I had to wash up then, Donna and I were going to meet Rodney and Melissa and Mike and Kristine at Papa's for pizza...  our usual Friday night group (the Darby's couldn't make it, they had out-of-town guests).  When I got back,  I prepped and sprayed the bezels, they are drying now.  I'm going to pack it in as soon as I lay in some pictures here.  I'll figure out what I'm going to do tomorrow, tomorrow.
You can see the crumbs of rubber here


The instrument panel is solid copper


I'm working on cleaning it up, it was pretty nasty also

Friday, February 4, 2011

Starting on the wiring

 Today was a good day,  Stuart came by to take a look at his Triumph Stag that has been staying in my garage while he has traveled the world with his work for the last 6 months.  He's fired up and ready to get busy restoring it.  He and I chatted for a little while then he went about working on the Stag while I continued my work on the E-Type.  I accomplished a good bit today.  I pulled the main bonnet wiring harness through this little bitty hole made even smaller by the fact that I had to put the weatherproof grommet in the hole first.  Inch by inch I finally got it shoved through, everything seems to line up with where it should be in the engine compartment.


The old harness
  I seemed to be missing something... I searched, then checked the invoice where I had purchased the harnesses...  I had failed to get a new Dash harness..  this is the harness that has all the lights, fuse connections, gauges etc.  I don't know if, at the time, I was thinking that I would just make do with the old harness or if I just failed to order it.  Nonetheless, I have to order one, the old one is much too stiff and discolored.  I'll get on that tomorrow.

 At that point, Rodney came in to hang out and help with whatever we were doing. I couldn't find part of the harness  I asked Stuart to take a look at the wiring diagram and help me see how the bonnet harness would hook up to the 2 rear harnesses. We (Stuart) worked at it and figured most of it out. Rodney and I proceeded to connect the inside portion of the harness. Hopefully tomorrow I can find a dash harness that isn't too outrageously expensive and/or isn't 4-6 weeks away.  With that discovery, I could go no further at the dash.  


After Rodney and Stuart left, I went ahead pulled the wires through the bodywork to the rear.  For some strange reason, Jaguar chose to route the wires going to the right side of the rear (right side taillights) down the passenger side of the car and the ones going to the left side of the car (left side taillights, fuel sending unit, fuel pump and back-up light) down the driver's side...  then both harnesses meet in the rear, not more that 3 feet from each other...  seems to me that they could have easily all gone down one side.  But what do I know?

After doing that, I had some more time to kill and was on a roll, so I went forward and started mounting the radiator tank and bracket.  Now the ENTIRE front of the car is held together with 5/16" bolts, that's what holds the engine, front suspension, huge bonnet and everything else that is in front of the driver to the part containing the driver... So, explain to me why 5/16" bolts are strong enough for that, but it takes to big honkin' 3/8" bolts to hold the little radiator tank and bracket on!  Who knows.  I'm sure that there is probably a perfectly good explanation for it.   While I was there, I wanted to see how the fan motor that I got from CoolCal was going to fit so I got it out of its box and started to mount it... one thing that they didn't mention was that to mount it you either had to take the steering rack loose or take the motor and it's bracket completely apart to get it to go on the picture frame mount. I chose to take the bracket off of the motor.
Not a huge problem, and it's mounted.  I'm sure I haven't thought things through entirely and I will probably at some point in the near future, have to remove one or both the motor and the steering rack to install some little bracket or something.  I'll cross that bridge when I get to it...  for now, I'm going to bed. 


Tuesday, February 1, 2011

Making Headway

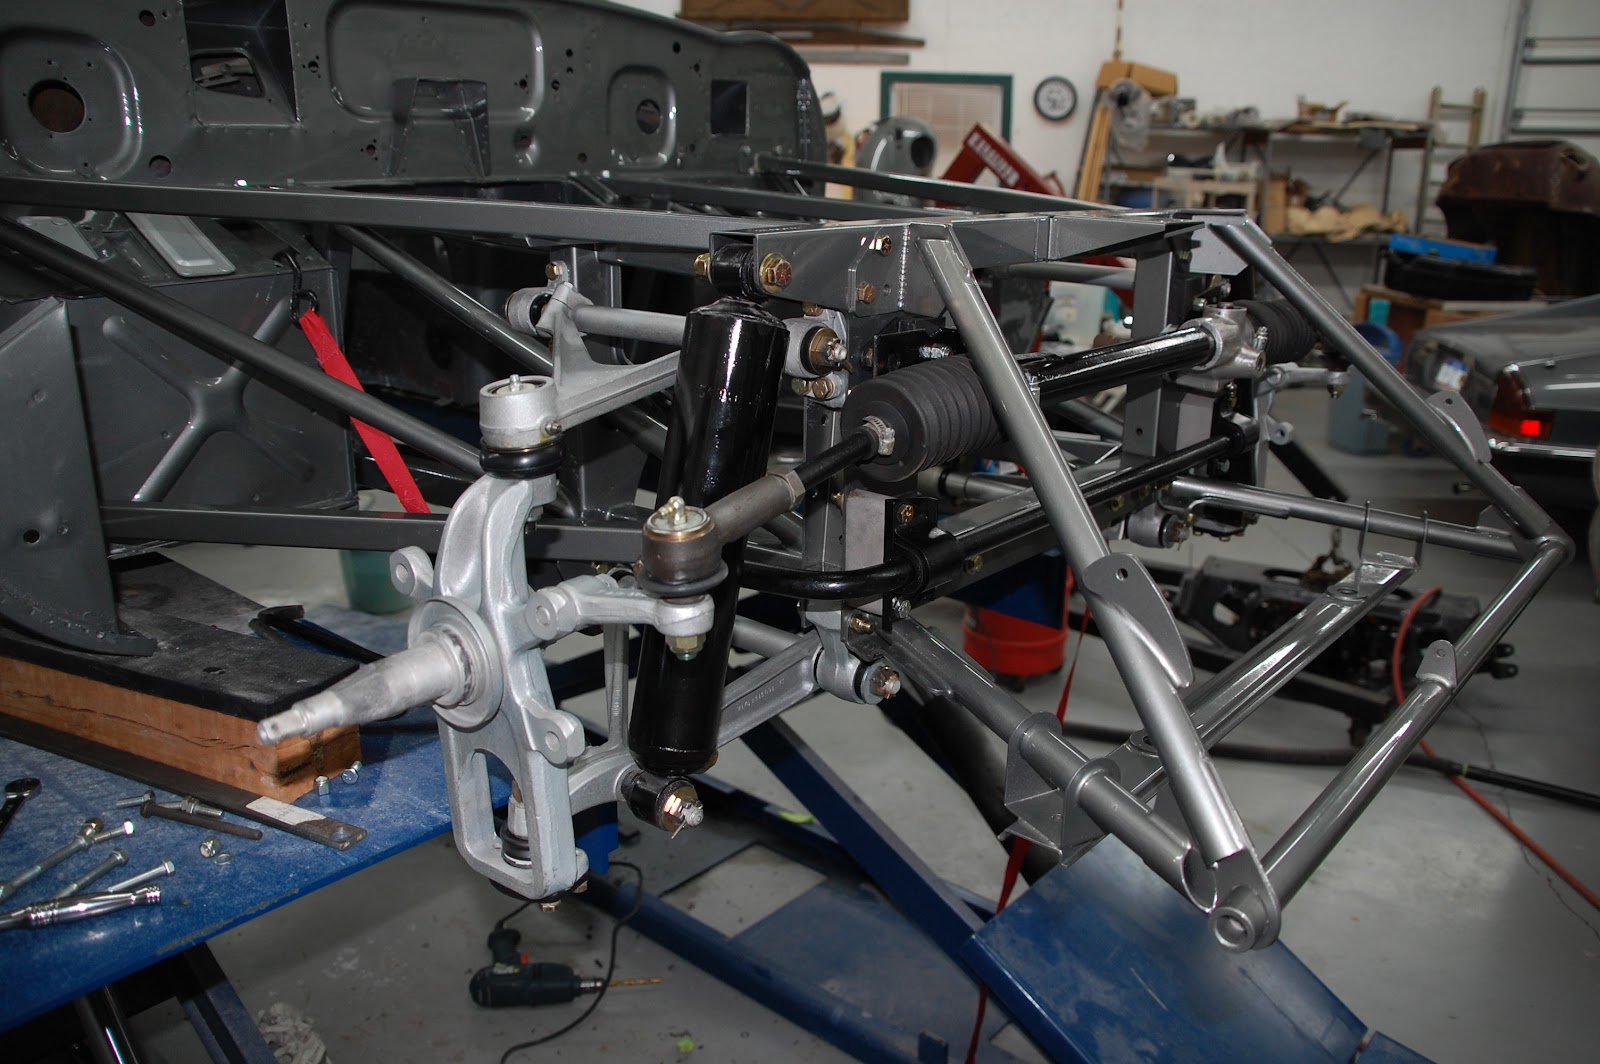
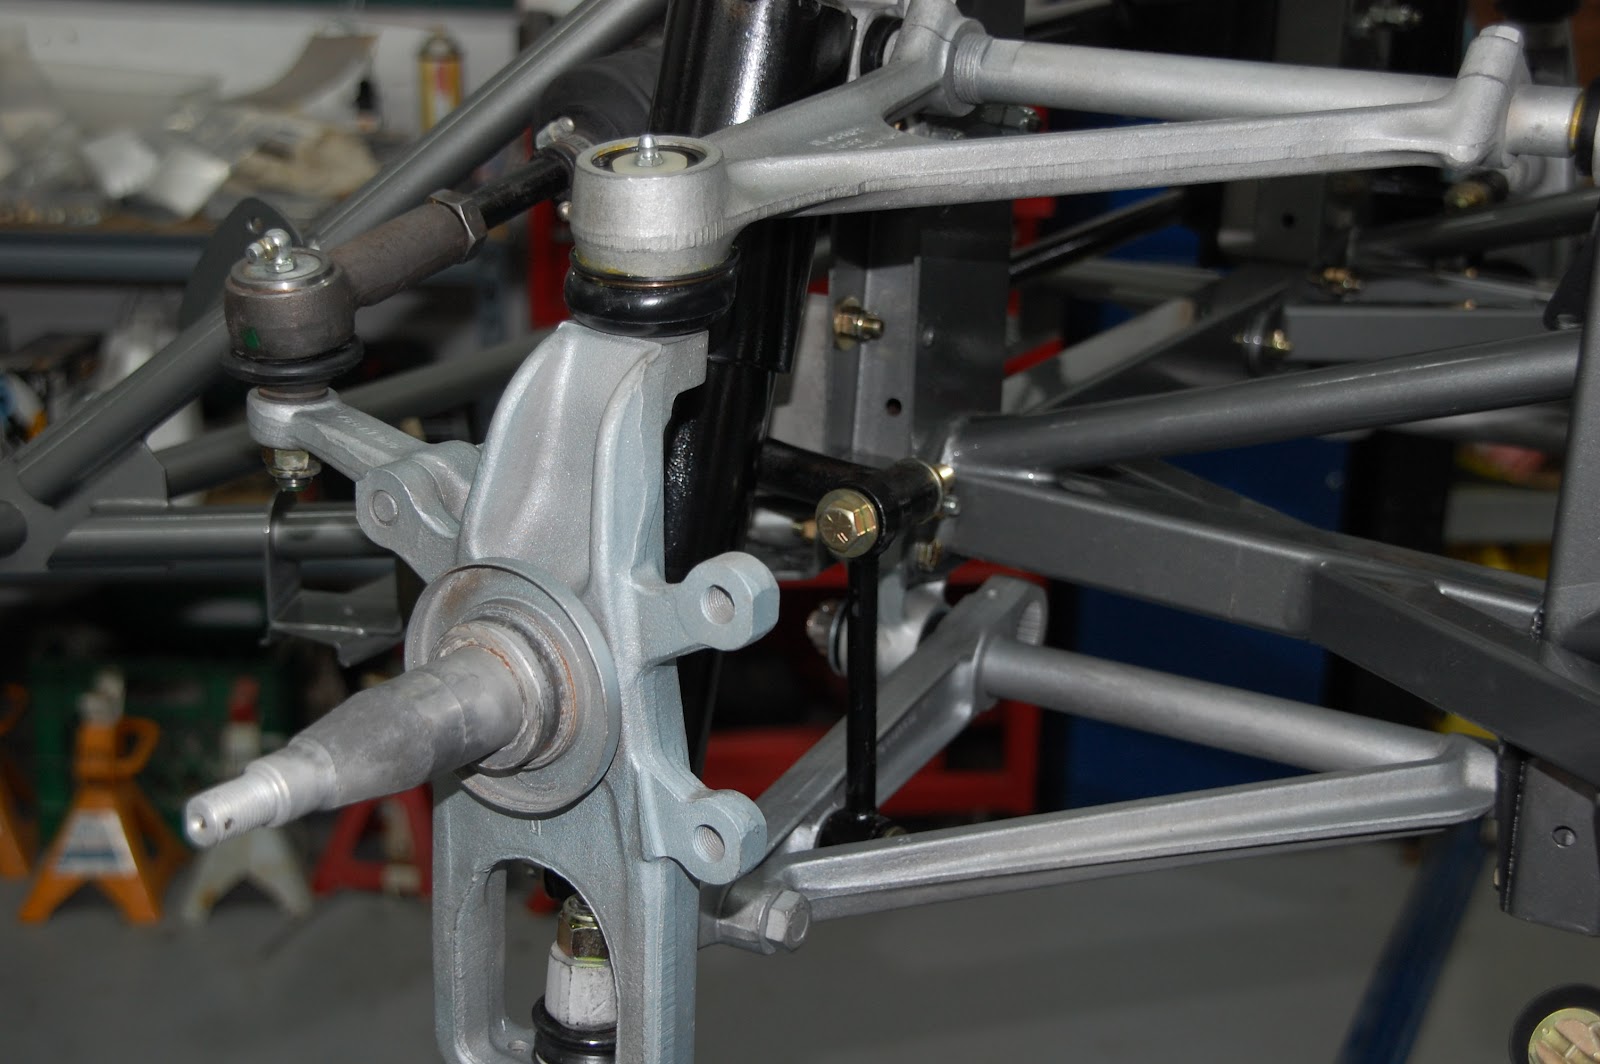
Over the last couple of days I have made what I would call some significant progress, With Rodney's help, I have gotten the front suspension, steering rack and anti-roll bar all fitted, knowing that I might have to remove some of it to make adjustments and such. I mainly wanted to make sure that I had all the pieces and that I knew how it all went together. I have new front shock absorbers, but they didn't come with the lower bushings, so before I can install them, I will need to find some.  I'm probably not going to replace the rears at this point, they are just too expensive, and the ones I had seemed pretty good.  I test fitted the torsion bars, I think that's not going to be a big problem either.  I guess the next step is going to be to start on the wiring.