 |
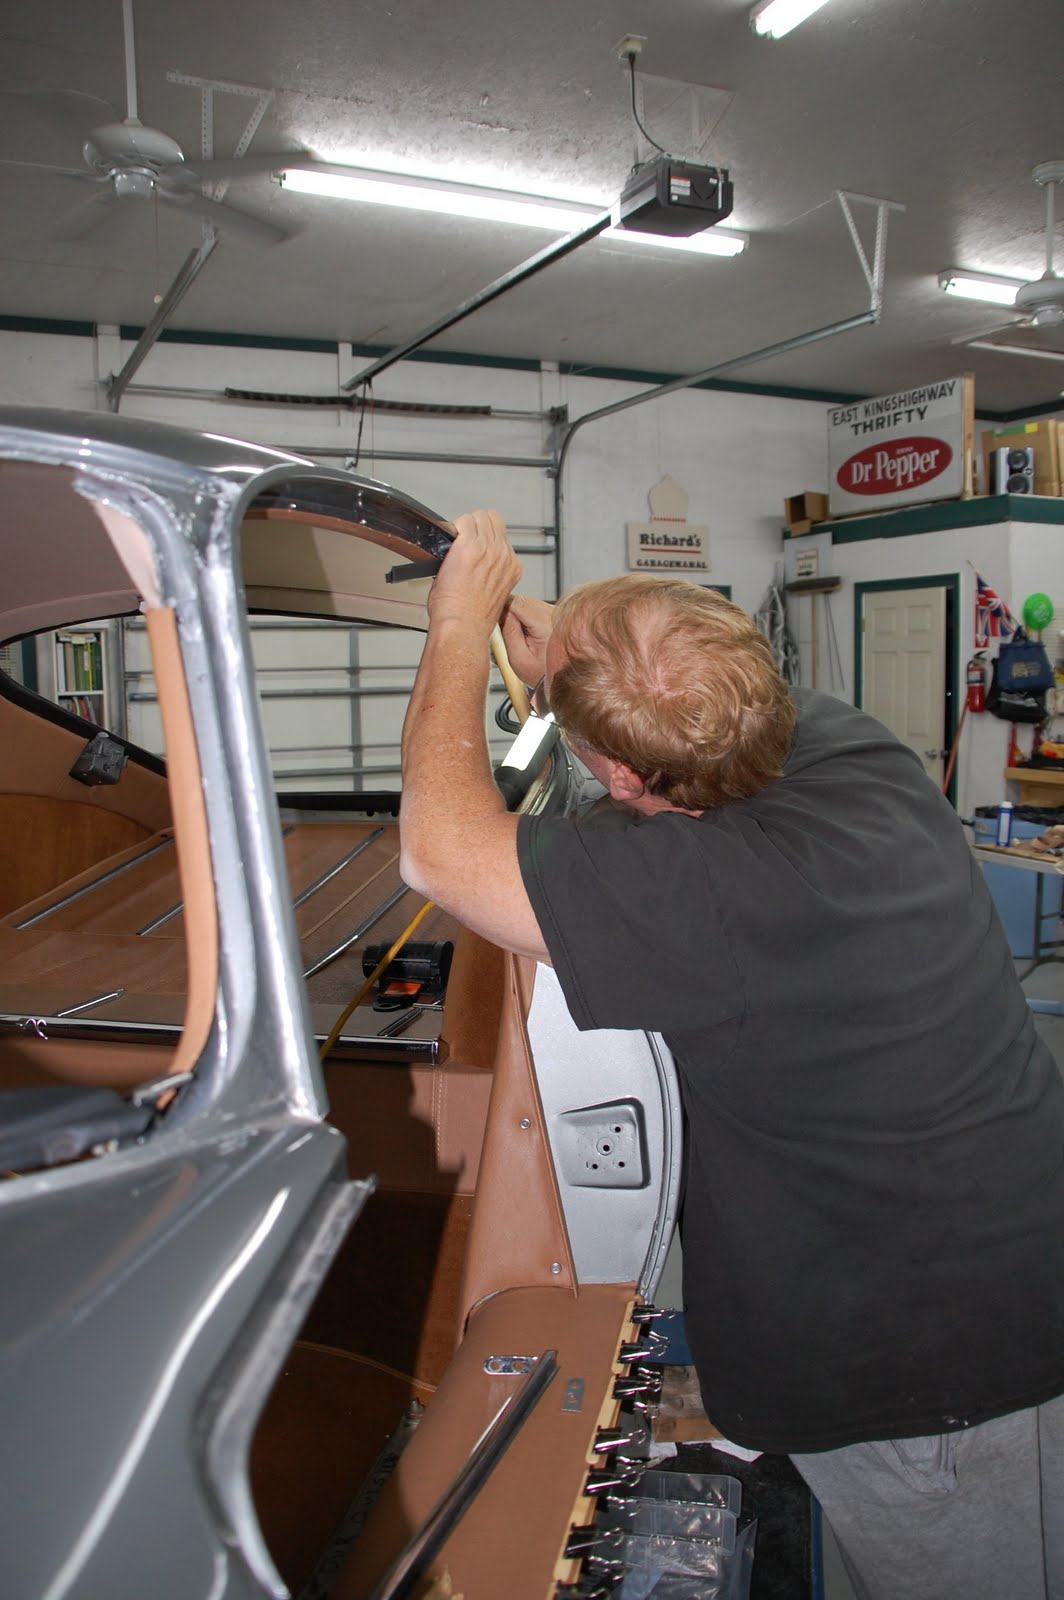
| Putting in the final cantrail screws. |

I've had a very productive week and with it being a long weekend, I managed to convince Rodney that he needed to be over here helping me. We finished up getting the cantrails installed and they look very good, if I do say so myself.
I'm very proud of how it's all going. The cantrails are a tight fit, they are installed with small screws that come in from the outside, through the rail that holds window gasket on.
 |
| Cantrail's in, "B" post is in... |
Next came the "B" post, that is the chrome piece that divides the door window and the rear quarter window.. The quarter window hinges on this post. I first had to install the rubber gasket before we could put the quarter windows in. There is a rail that accepts the "T" shaped edge on the gasket. It's not exactly easy to get the rubber squeezed into the rail, but as with most of this stuff, with a little practice it gets easier.
 |
| Rodney, looking for the latch's screw holes. |
 |
| Quarter windows installed |
Once this was done, Rodney and I were able to install the quarter windows. This actually went fairly smoothly. Getting the rear latch on was a little more tricky.

Good ol' Rodney voluntarily climbed in to help mount the latches. These windows swing out at the rear to allow for some ventilation. He was a little tentative about poking a few holes in the newly covered wing panels but I convinced him to poke away. I held the glass. It didn't take long and we (Rodney) had the latches mounted and operating flawlessly.
This had been our goal for the evening but it went so well that we decided to press on. I had been dreading installing the glass in the rear hatch. I had never done anything like that. We decided to tackle this little task... kinda like the blind leading the blind.
 |
| Whew!!! |

I put the rubber gasket surround on the glass and then ran a piece of nylon cord around into the grove that fits the opening in the rear hatch. By doing this, it will allow me to put the glass over the hole in the hatch and pull the string and thereby forcing the lip of the groove in the gasket onto the edge inside the hatch. I guess I would have to just show you, it's hard to explain, and harder to do, but we got it done, miraculously without breaking the glass or scratching the new paint on the hatch.
 |
| Gojo = good slickum |
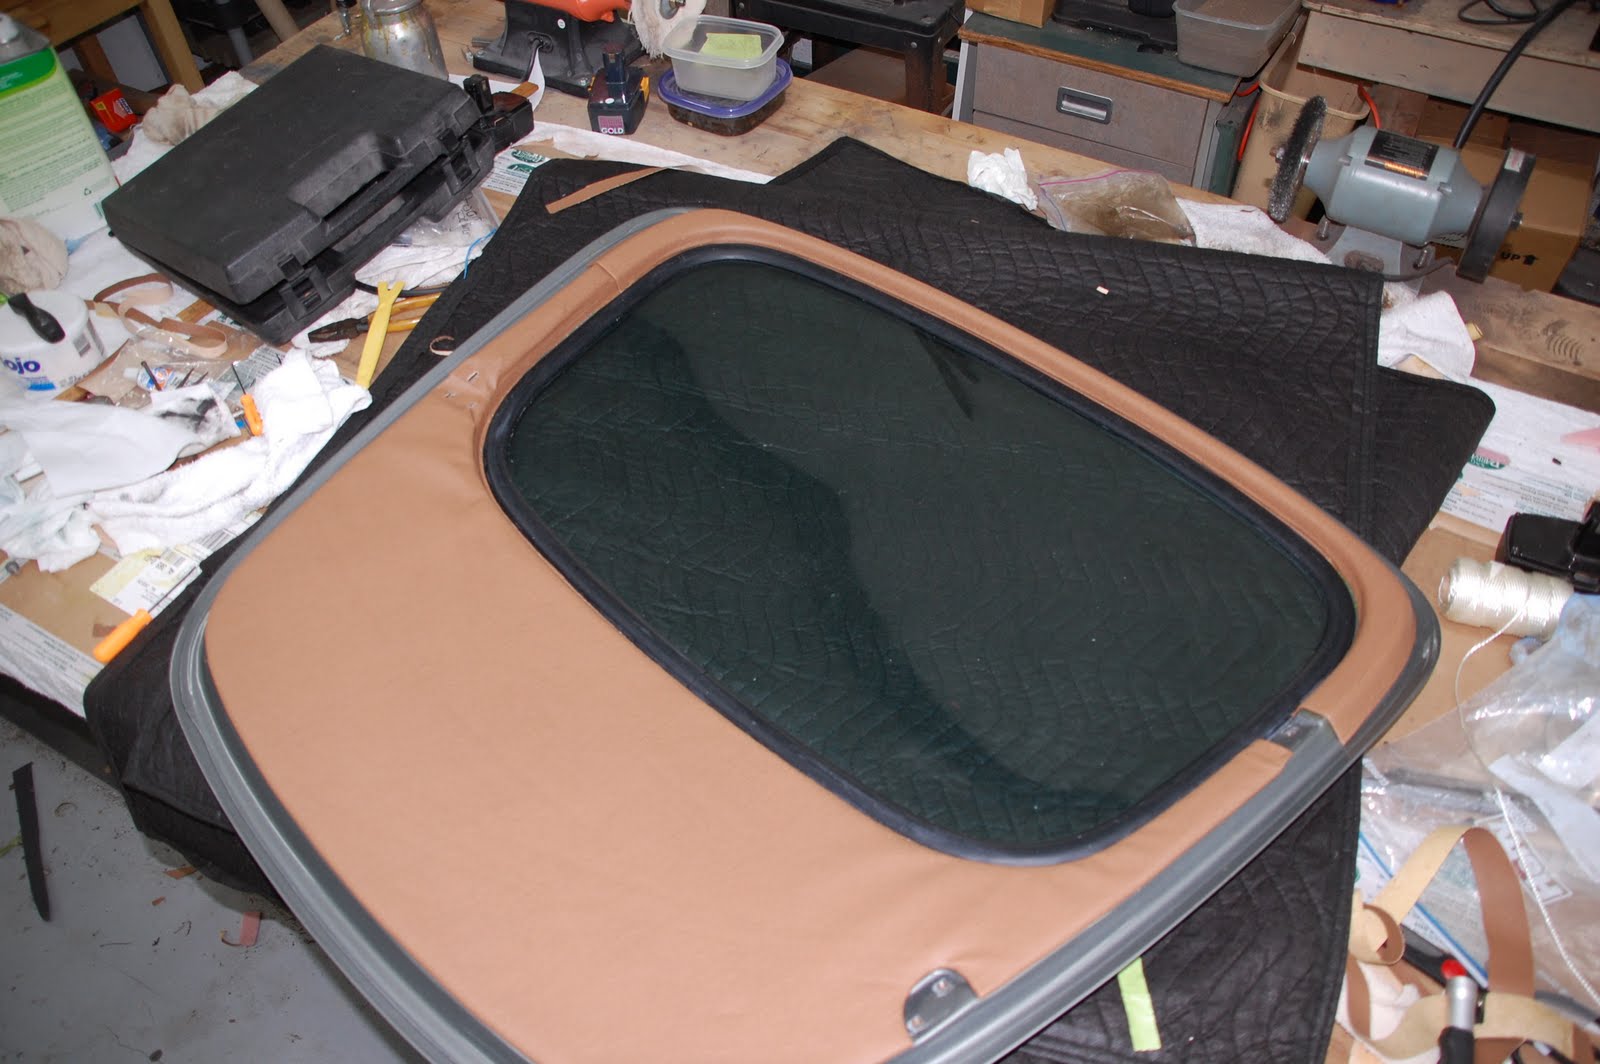
Next came the rubber insert that squeezes into a slot in the rubber gasket. This spreads the gasket out, holding it securly in place. Installing it is a tedious job, but once you get the hang of it and using a generous amount of Gojo on the rubber for lubrication makes it go a lot easier.
 |
| The helps keep me from scratching the paint |

Next is the chrome trim, it's two half moon shaped pieces that surround the glass. It has to slip between two slits in the gasket and is then held in place by these slits. It really helps to have a second pair of hands when doing this because just when you think you have one end in, the other end tries to jump out. Creme Gojo also helps with this step, along with a right angled pick of some sort.
 |
| The rear hatch is nearly complete |

We stuck on the chrome Jaguar emblem, stepped back and admired our work. It was a major step in the restoration process completed.
We did a test fitting, got the hinges all aligned and called it a night. I broke out my bottle of 18 yr old Single Malt Scotch and poured us a drink.


While we were enjoying our Single Malt, we started looking at the vinyl covering and fitting it to the inside of the hatch. It was immediately apparent that we needed to take the hatch off to cover it. We made plans to do this the next day.
When Rodney arrived the next day, we removed the hatch and prepared to do the upholstery. The panels came to me pre-covered and fit nicely. I had to install the clips that snap into the holes on the hatch interior. Then we glued the upper part onto the top of the hatch and let it set up for a while
The vinyl pieces needed a good bit of trimming (Rodney cringes), and then it had to be tucked under the rubber seal!?!?!?!? How the heck am I going to do this? Well, turns out that it wasn't quite as bad as I thought it would be. Using the same right angled pick that I used on the seal earlier, along with a plastic chisel looking tool, I managed to get it tucked in without too much of a struggle. I then painted the latch. Once it's dry, the hatch will be done and installed for good, I hope. Then Rodney and I polished off the last of the Single Malt.

 I've had a very productive week and with it being a long weekend, I managed to convince Rodney that he needed to be over here helping me. We finished up getting the cantrails installed and they look very good, if I do say so myself.


 Good ol' Rodney voluntarily climbed in to help mount the latches. These windows swing out at the rear to allow for some ventilation. He was a little tentative about poking a few holes in the newly covered wing panels but I convinced him to poke away. I held the glass. It didn't take long and we (Rodney) had the latches mounted and operating flawlessly.

 I put the rubber gasket surround on the glass and then ran a piece of nylon cord around into the grove that fits the opening in the rear hatch. By doing this, it will allow me to put the glass over the hole in the hatch and pull the string and thereby forcing the lip of the groove in the gasket onto the edge inside the hatch. I guess I would have to just show you, it's hard to explain, and harder to do, but we got it done, miraculously without breaking the glass or scratching the new paint on the hatch.

 Next is the chrome trim, it's two half moon shaped pieces that surround the glass. It has to slip between two slits in the gasket and is then held in place by these slits. It really helps to have a second pair of hands when doing this because just when you think you have one end in, the other end tries to jump out. Creme Gojo also helps with this step, along with a right angled pick of some sort.
 We stuck on the chrome Jaguar emblem, stepped back and admired our work. It was a major step in the restoration process completed.
 While we were enjoying our Single Malt, we started looking at the vinyl covering and fitting it to the inside of the hatch. It was immediately apparent that we needed to take the hatch off to cover it. We made plans to do this the next day.

All I can say is, you are an automobile genius. As for me all I can do is change spark plugs and tires.
ReplyDeleteshes starting to look great Richard! It's come a long way since I last saw it at your place.
ReplyDeleteGreat work guys ... I need a Rodney to help me with my firewood ;-)
ReplyDeleteAnyway, it is really looking good ... can't wait to see it rolling down the highway!